
Getting your Instagram Story specs right is the first—and most crucial—step to creating content that looks sharp and professional. The magic numbers are 1080 pixels wide by 1920 pixels tall, which locks your content into the ideal 9:16 aspect ratio. Nail this, and you're already halfway to a Story that stops the scroll.
Table of contents
Your Instagram Story Specs Cheat Sheet
For anyone serious about their Instagram presence, knowing these specs isn't just a recommendation—it's essential. If you upload content that doesn't fit, Instagram's algorithm takes over. It might awkwardly crop your masterpiece or zoom in, immediately tanking the quality and making your brand look amateur.
Sticking to the official guidelines guarantees every pixel appears exactly as you intended, creating a seamless, high-quality experience for your followers. This isn't just about looking good; it's about building trust. Polished content signals credibility and tells your audience you care about the details.
Think of this as your go-to reference guide to eliminate the guesswork. Before you hit export on your next creation, a quick check here will save you from common upload headaches.
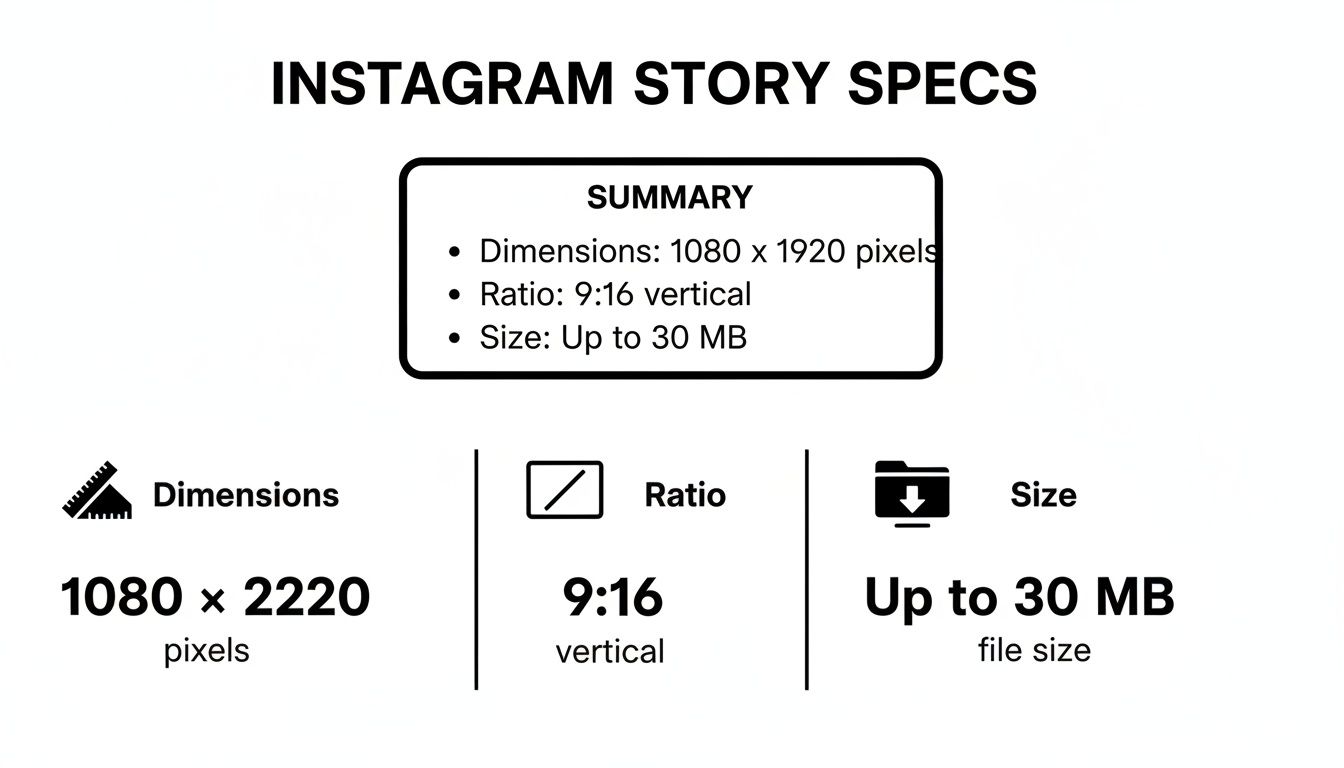
This visual breaks it all down: the 1080x1920 pixel canvas, the non-negotiable 9:16 vertical ratio, and the all-important file size limits. Getting these three pillars right is your ticket to avoiding ugly compression artifacts and weird crops.
Instagram Story Specifications Quick Reference
To make it even easier, here's a quick-glance table with the core specs for both images and videos.
| Specification | Image Requirements | Video Requirements |
|---|---|---|
| Dimensions | 1080 x 1920 pixels | 1080 x 1920 pixels |
| Aspect Ratio | 9:16 | 9:16 |
| File Formats | JPG, PNG, GIF | MP4, MOV |
| File Size Limit | 30 MB | 4 GB |
| Duration Limit | N/A | 60 seconds per segment |
Keep this table handy, and you'll never have to second-guess your export settings again.
Pro Tip: Here’s a piece of advice I always give: create your content at 1080x1920 from the very beginning. Don't create something in a different size and rely on Instagram's editor to fix it. Exporting in the native format gives you total control and preserves the quality you worked so hard to achieve.
When you've mastered these technicals, you've built the perfect foundation. From here, you can confidently add stickers, polls, and powerful calls-to-action, knowing your visual canvas is already optimized. For example, a great next step is driving traffic, and a simple way to start is to learn how to copy your Instagram link so you can share it everywhere.
Why Mastering Story Specs Is a Game-Changer for Your Brand
Getting your Instagram Story specs right isn't just about ticking off technical boxes. It's a strategic move that fundamentally changes how people see your brand. When your content fits the screen perfectly, it looks polished, professional, and immersive. This small detail sends a big message about quality and builds trust, making your audience far more likely to stick around and listen to what you have to say.
Think of it this way: it’s the difference between a custom-tailored suit and one bought off the rack. A perfectly formatted Story feels like it was made just for the viewer. It holds their attention and keeps them watching. On the flip side, a blurry, awkwardly cropped image or video screams amateur, and you’ll lose viewers to a quick swipe-left before you can even make your point.
Building a Seamless Path for Your Followers
Nailing your Instagram Story specs is the foundation for guiding your audience from being passive viewers to active participants. The whole point is to remove any and all friction. When a Story looks great and is easy to watch, people are way more open to your call-to-action—whether that's tapping a poll, answering a quiz, or clicking a link sticker.
This smooth experience is absolutely essential for turning followers into customers. A sharp, full-screen video that flows naturally to a clean Taap.bio page just feels right. You can even take it a step further when you connect your Facebook page to Instagram, which helps create a more unified brand presence and makes the user journey even smoother.
Tapping into a Huge Audience
The need to get these details right is amplified by the massive scale of Instagram. Since launching back in 2016, Stories have become a powerhouse, attracting 500 million daily active users—a number that has held steady for years. With over a billion Stories shared daily across Meta’s apps and a third of the most-viewed content coming from businesses, the potential for brand exposure is just massive. You can dig into more incredible stats on the rapid growth of Instagram Stories at SocialMediaCurve.com.
When you optimize every piece of content, you're doing more than just posting a picture. You're cementing your brand's identity, grabbing precious attention, and turning viewers into a real community. Every pixel-perfect Story is a building block for a stronger, more credible presence.
Technical Specs for Instagram Story Images
While video often steals the spotlight, a well-designed image can be an incredibly powerful and direct way to get your message across in Instagram Stories. Getting your images to look sharp, professional, and not a pixelated mess comes down to one thing: nailing the technical specs. Think of these less as suggestions and more as the rules of the game for quality content.
The foundation of any great Story image is its size and shape. Instagram is built for a vertical, full-screen mobile experience, and your content has to match that.
Mastering Dimensions and Aspect Ratio
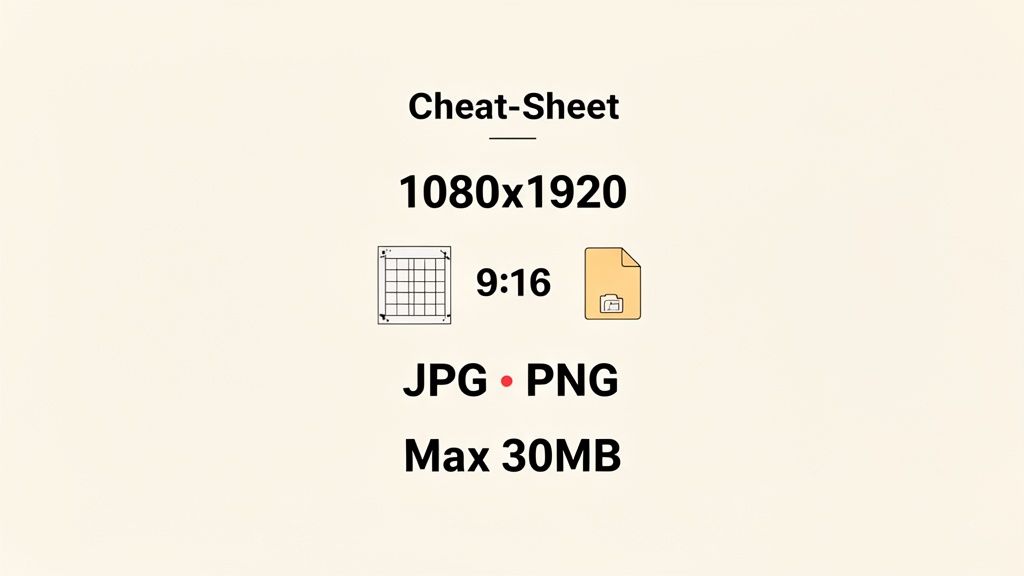
Let’s get straight to the point: the ideal dimensions for an Instagram Story image are 1080 pixels wide by 1920 pixels tall. No exceptions. This creates the perfect vertical canvas that fills the entire phone screen without any weird cropping.
This specific size locks your image into a 9:16 aspect ratio, the absolute standard for all Story content. If you try to upload something different—like a square photo from your grid (1:1) or a landscape image (16:9)—Instagram will take over. It will crop, zoom, or slap on some ugly colored bars to force it into the 9:16 frame. You lose control, quality plummets, and your beautiful design gets butchered.
By creating your images at 1080x1920 from the start, you guarantee that what you see in your design software is exactly what your audience sees on their phones.
Choosing the Right File Format
The file format you save your image as directly impacts its quality and how fast it loads for your viewers. Instagram gives you two main options, and knowing when to use each is key.
JPG (JPEG): This is your best friend for most photographs or complex images with lots of colors and gradients. JPGs use smart compression to keep file sizes down, which means your Stories load quickly, even for people on a shaky connection. The trade-off is a tiny, often unnoticeable, loss in quality.
PNG: Reach for a PNG when you're working with graphics, logos, text overlays, or anything that needs a transparent background. PNGs are "lossless," meaning they preserve every pixel of quality, keeping lines and text perfectly crisp. The only downside is that PNG files are usually much larger than JPGs.
So, for photos? A high-quality JPG is your best bet. For graphic-heavy designs? Go with a PNG.
Key Takeaway: The absolute maximum file size for a Story image is 30MB. Honestly, if your image is anywhere near that big, something is wrong. Aim to stay well below this limit to ensure your content loads instantly and people don't swipe past before it even appears.
The Importance of Safe Zones
This is probably the most common mistake I see creators make. They design a beautiful Story, only to have a key part of it—like a call-to-action or a logo—hidden by Instagram’s own interface. Remember, your profile icon and username are at the top, and the reply bar sits at the bottom.
To avoid this rookie error, you have to design within the Instagram Story safe zones. A good rule of thumb is to leave about 250 pixels of empty space at both the top and the bottom of your 1080x1920 canvas.
Keep all your essential elements—text, logos, stickers, and buttons—out of these top and bottom zones. This simple step ensures your message is always clear, visible, and effective.
A Complete Guide to Instagram Story Video Specs
Video is where Instagram Stories truly come alive. It's dynamic, it's engaging, but it's also technically demanding. Unlike a simple photo, a dozen different settings can make or break your video's quality—everything from the resolution and file size to the audio codecs. Getting these details right is what separates a crisp, professional-looking clip from a pixelated, stuttering mess that your followers will skip in a heartbeat.
First things first, the foundational specs for video are the same as they are for images. You're working with a canvas that's 1080 pixels wide by 1920 pixels tall. This locks you into that all-important 9:16 aspect ratio, which is absolutely non-negotiable if you want that immersive, full-screen experience that grabs attention from the very first frame.
Core Video File Requirements
Before you even think about export settings, let's make sure your video file meets Instagram's basic, must-have criteria. If you miss any of these, you'll likely hit an immediate upload error, and your hard work will never see the light of day.
- File Formats: Instagram gives you two options: MP4 and MOV. Both work, but I always recommend sticking with MP4. It offers a fantastic balance of quality and compression, which means it plays nicely on just about any device out there.
- Maximum File Size: You’ve got a pretty generous 4 GB limit for a single video Story. Honestly, this is way more than you should ever need for a 60-second clip. If your file is bigger than that, it's a huge red flag that your compression settings are way off.
- Video Duration: Each individual Story slide can be up to 60 seconds long. If you happen to upload a longer video, don't worry—Instagram will automatically chop it up into 60-second segments for you.
Getting your video file to fit these specs without losing that sharp look is a crucial step. You can find some great strategies to compress video for Instagram Stories that really help maintain a professional feel.
Recommended Video Export Settings
Okay, so you’ve filmed your masterpiece and edited it to perfection. The final step—exporting—is where the magic really happens. Dialing in the right settings in your video editor, whether you're using Adobe Premiere Pro, Final Cut Pro, or CapCut, will ensure your Stories look flawless every time.
Here are the exact settings I use and recommend. Think of this as your cheat sheet for perfect video exports.
Recommended Video Export Settings for Instagram Stories
| Setting | Recommendation | Why It Matters |
|---|---|---|
| Codec | H.264 | This is the gold standard for web video. It gives you the best quality for the smallest file size. |
| Frame Rate | 30 FPS (Frames Per Second) | This delivers that smooth motion we're used to seeing, without bloating your file size. |
| Bitrate | 3,500 kbps (3.5 Mbps) | This is the sweet spot. It keeps your 1080p video looking sharp even after Instagram compresses it. |
| Audio Codec | AAC (Advanced Audio Coding) | The standard for clean, compressed audio that sounds great coming from a phone speaker. |
| Audio Sample Rate | 44.1 kHz | This industry standard ensures your audio is crisp, clear, and compatible everywhere. |
| Audio Channels | Stereo | It just sounds better and more immersive than mono, without a major hit to your file size. |
Nailing these export settings is the key to producing content that looks just as good on Instagram as it did on your timeline.
Pro Tip: Whatever you do, always render your video with these settings and transfer the final file directly to your phone. Don't send it through WhatsApp, iMessage, or Facebook Messenger first! Those apps crush video quality with their own aggressive compression, and all your hard work will go down the drain.
Taking the time to master these video specs means you're removing all the technical roadblocks. It lets your creative message shine through without any friction. And if you're looking to take your video strategy a step further, think about how you can direct viewers to a full video link in your bio to turn those quick Story views into deeper engagement with your best content.
Navigating Instagram Story Safe Zones
So, you’ve meticulously crafted your image or video to the perfect 1080x1920 pixels. Great start, but you're not out of the woods yet. One of the most common—and frustrating—mistakes I see is creators forgetting that the Instagram interface itself will cover parts of their beautiful work.
Think about it: your profile icon, username, the reply bar, and any interactive stickers all sit on top of your content. These create critical “no-go” areas. This is exactly why understanding Instagram Story safe zones is a total game-changer. The safe zone is simply the central part of the screen where your content is guaranteed to be seen, clear of any obstructions. Placing your most important stuff—text, logos, CTAs—within this area ensures your message actually lands.
The Magic Numbers for Safe Zones
To keep your content from getting cut off, you need to leave some breathing room at the top and bottom of your canvas. While Instagram doesn't publish official dimensions for this, the community has figured out what works best through trial and error.
Here are the numbers to live by:
- Top Buffer: Keep essential elements out of the top 250 pixels. This is where your profile pic and username live, along with the progress bar for the Story.
- Bottom Buffer: Leave a bit more space at the bottom, about 310 pixels. This area gets crowded with the reply bar ("Send message") and any link stickers you might add.
Stick to these margins, and you’re left with a core viewable area of roughly 1080 x 1360 pixels. If you design with that central space in mind, your Stories will always look professional and clean. You're working with the UI, not fighting against it.
A Visual Guide to Staying in the Clear
Sometimes, a picture is worth a thousand pixels. This image breaks down exactly where those pesky UI elements will show up, so you can see precisely where to place your content to keep it safe.
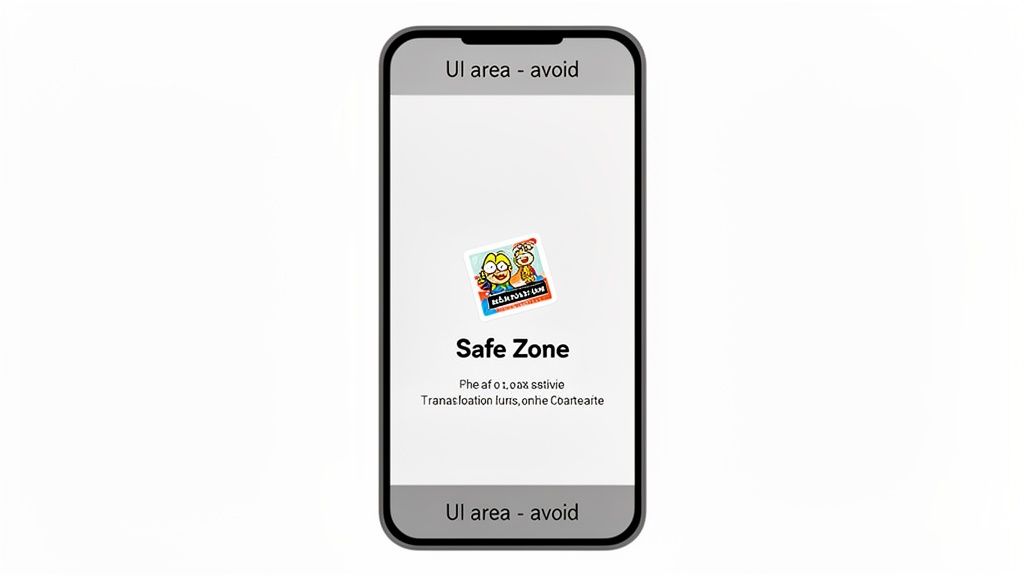
I recommend saving this image or using it as a template when you’re designing. It’s a constant reminder to keep the important stuff centered. For example, if you're adding interactive stickers like polls, quizzes, or location tags, you’ll want to drop them right in the middle of that safe zone.
Speaking of location tags, if you want to get more advanced with geotagging, we have a whole guide on how to create a custom location on Instagram. Placing those tags within the safe zone makes them easy for your followers to see and tap, which is a fantastic way to boost engagement.
How to Fix Common Upload and Quality Issues
We’ve all been there. You follow every single Instagram Story spec perfectly, yet your content still looks… off. That crystal-clear video you shot now has a strange, pixelated haze, or your vibrant graphic looks dull and washed out. What gives?
It usually boils down to one thing: Instagram’s compression. The platform crunches down every file you upload to save server space, but you can minimize the damage. More often than not, issues like color banding (those ugly stripes in your beautiful sky gradients) or fuzzy compression artifacts are a result of your export settings or even your internet connection. Let's figure out what’s going wrong.
Diagnosing Blurry or Pixelated Stories
The number one enemy of a high-quality Story is Instagram's own compression algorithm. It’s aggressive. If you upload a file that’s already been heavily compressed or has a low bitrate, Instagram’s process just makes it look even worse.
The best defense is a good offense. Always start with the highest quality source file you can. When exporting video, make sure you’re using the recommended H.264 codec and sticking to a bitrate around 3,500 kbps. This gives the algorithm plenty of data to work with, which means your final Story will look much cleaner and sharper.
Your network connection can also be a surprisingly sneaky culprit.
- Weak Wi-Fi or Cellular Data: An unstable connection can cause Instagram to automatically lower the upload quality to prevent it from failing altogether. Always try to upload on a strong, stable connection.
- Data Saver Settings: Don't forget to check your app settings. If Instagram's "Data Saver" mode is turned on, it’s doing its job by intentionally reducing the quality of your uploads.
Think of it this way: you want to hand Instagram a clean, high-bitrate file over a fast, stable connection. This gives its compression less work to do, preventing it from having to "guess" and fill in the blanks, which is what destroys all those sharp details you worked so hard on.
Troubleshooting Common Upload Errors
What about when your Story just refuses to upload? If you’re getting a "failed to upload" error, it’s almost always a file compatibility problem. Before you panic, run through this quick checklist.
- Incorrect File Format: Is your video an MP4 or MOV? Are you using a JPG or PNG for your image? Trying to upload something like an AVI video or a TIFF image will get you an instant rejection.
- Exceeding File Size Limits: This is a hard-and-fast rule. Your image must be under 30MB, and your video can't be a byte over 4GB.
Sticking to these technical basics solves the vast majority of upload headaches. And once you have your content up, you can focus on strategy. For more ideas, check out our guide on how to repost an Instagram post to keep your feed fresh.
Getting these specs right is more than just a technical exercise; it's a business essential. Consider this: one-third of the most-viewed Instagram Stories are from businesses, and Stories ads pulled in a staggering $15.95 billion in 2022. With an 88.2% completion rate for brand stories, ensuring your content looks professional is key to making sure your message lands. You can find even more statistics on Instagram's business impact on EmbedSocial.com.
Got Questions About Story Specs? We've Got Answers.
Even with a perfect cheat sheet, real-world questions always pop up. I get it. You've spent time creating something awesome, and the last thing you want is for a technical glitch to ruin it. This section is your go-to for those nagging "what if" scenarios.
Think of this as a conversation where we tackle the common headaches creators run into. We'll move past the basic numbers and get into the practical stuff that really makes a difference.
What Happens If My Story Isn't the Right Size?
If you upload content that isn’t the recommended 1080x1920 pixels, Instagram tries to "help" by automatically adjusting it. Trust me, you don't want its help. The platform will either awkwardly crop your content, chopping off key visuals, or it will zoom in, making your beautiful image look like a pixelated mess.
Either way, you lose creative control, and your Story ends up looking unprofessional. The fix is simple: always start your design on a 9:16 canvas from the very beginning.
Can I Post Horizontal Content to My Story?
Technically, yes. But should you? Probably not. When you upload a horizontal (16:9) photo or video, Instagram will display it with massive, distracting colored bars above and below to fill the vertical screen.
This completely shatters the immersive, full-screen experience that makes Stories so powerful. If you absolutely have to use horizontal footage, a much better approach is to place it onto a branded 1080x1920 background in an app like Canva or CapCut before uploading.
Why Do My Stories Look Blurry After Uploading?
Ah, the dreaded blurriness. This is almost always due to Instagram's aggressive compression algorithm. Here are the usual suspects:
- Starting with a weak file: If your original photo or video is already low-resolution, Instagram’s compression will only magnify the problem. Always start with the highest quality source file you can.
- The double-compression trap: Never, ever send your media through apps like WhatsApp or Messenger before uploading. They compress files heavily, so when you upload to Instagram, it gets compressed a second time.
- A spotty connection: Uploading on weak Wi-Fi or a shaky cellular signal can trigger Instagram to lower the quality to ensure the upload doesn't fail.
My Pro Tip: The best way to combat blurriness is to give Instagram a pristine file. Export videos using the H.264 codec with a bitrate of at least 3,500 kbps. Then, get that file directly to your phone via AirDrop or a cloud service—not a messaging app.
How Can I Make Sure My Text Never Gets Cut Off?
This one is all about respecting the Instagram Story safe zones. Remember, Instagram slaps its own interface elements—like your username at the top and the reply bar at the bottom—right over your content.
The easiest way to avoid any issues is to leave a buffer of about 250 pixels at the top and bottom of your 1080x1920 canvas. Keep all your important text, stickers, and CTAs out of these zones, and you'll guarantee your message is always seen loud and clear.
Ready to build a link-in-bio page that looks just as good as your Stories? With Taap.bio, you can create a personalized, grid-based page that beautifully showcases what you do. Ditch the boring list of links and design a page that actually reflects your brand. Create your free Taap.bio page today!


