You’ve probably done this in the last week. You’re tapping through Stories, you spot an effect that makes someone’s Reel look sharper, warmer, funnier, or just more polished, and then you lose it. You tap the profile, open the camera, try random keywords, and end up with a pile of bad filters you’ll never use.
That frustration is normal. The good news is that how to search for effects on instagram is a skill, not a mystery. Once you know where effects show up, how Instagram labels them, and how to save the good ones fast, your content workflow gets much easier.
Most creators waste time hunting one filter at a time. Better creators build a small, reusable effect library that fits their style. If you’re also trying to improve reach, this works best alongside broader digital marketing strategies for Instagram that cover views, consistency, and format choices. And if you keep forgetting what filters are called, this roundup of Instagram filter names is useful to bookmark.
Table of contents
The Search for the Perfect Instagram Effect
The most common mistake is treating effects like decoration. They’re not. They’re part of packaging.
A food creator might use a subtle warmth effect to make every dish feel consistent. A comedian might keep a few face-warp filters ready for punchlines. A musician might lean into grain, glow, and low-light effects so every Story feels like the same visual world. When you see creators who “just look good on Instagram,” that usually isn’t luck. They’ve built a repeatable visual system.
What usually goes wrong
Users often search in the wrong order:
- They start with vague keywords like “cute” or “cool”
- They forget to save effects when they find one
- They rely only on the main gallery
- They never track the creators behind the effects they like
That last one matters more than people think. If you only chase whatever is floating around your feed, your style stays random. If you collect effects intentionally, your Stories and Reels start feeling connected.
You don’t need more effects. You need fewer, better ones that match your face, lighting, niche, and editing style.
The shift that helps
Think in three hunting modes:
- Official gallery when you know the vibe or category you want
- Discovery in the wild when you see a filter used on someone else’s Story or Reel
- Creator tracking when you want better options than the algorithm usually surfaces
That’s the difference between browsing and curating.
If you’re busy, that’s the entire mental model. Open the gallery when you need something now. Save effects from live content when you spot them. Follow AR creators when you want a deeper bench of options.
Mastering the Official Effect Gallery
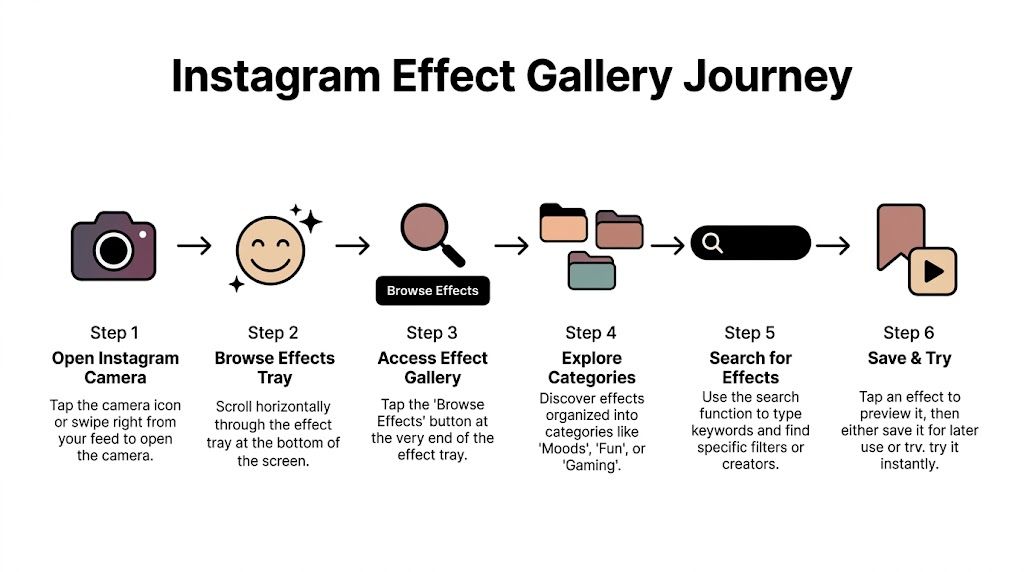
The official gallery is still the fastest place to start when you want a certain look and don’t care who made it. Instagram’s Effects Gallery contains thousands of AR filters, and the built-in search sits right inside the camera flow. The basic path is simple: open Your Story, tap the effects icon with three stars, and the search bar appears at the top left. According to the cited guide, 70% of Stories incorporate effects, and effect-enhanced Stories can see 2.5x average views compared to plain Stories in Instagram reporting referenced there, via this walkthrough.
Search from Stories
If you’re posting to Stories, use this path:
- Open Instagram.
- Swipe right from the feed, or tap Your Story.
- Tap the three-star effects icon.
- Use the search bar in the top-left area.
- Type a specific keyword.
- Preview the effect live.
- Tap the down arrow to save it if it works.
The key is keyword quality. Broad terms produce clutter. Specific terms produce usable results.
Try searches like:
- “film grain” instead of “vintage”
- “soft glow” instead of “pretty”
- “blur makeup” instead of “beauty”
- “retro camcorder” instead of “old school”
Search from Reels
Reels has a slightly different rhythm because many people choose effects after selecting media.
Use this approach:
- Start a Reel: Tap the plus icon and choose Reel.
- Select or record media: Then tap Effects.
- Search by look or function: Good searches include mood, lens style, face distortion, color treatment, or creator name.
- Test before committing: Some effects look great live and terrible once text overlays are added.
What works best in the gallery
The gallery is strongest when you already know the function you need.
Here’s a quick way to think about it:
| Goal | Better search style | Weak search style |
|---|---|---|
| Cleaner face effect | “skin blur natural” | “nice face” |
| Fashion mood | “editorial flash” | “cool filter” |
| Comedy bit | “big mouth” or “face warp” | “funny” |
| Cozy Story aesthetic | “warm grain” | “cute” |
Practical rule: Search for the result, not the mood. Instagram can match “grain,” “glow,” or “warp” better than vague taste words.
What to save and what to skip
Save effects that do one job well. Skip effects that stack too many things at once, like heavy blur plus fake freckles plus color wash plus giant lashes. Those usually age badly, and they make your content feel borrowed instead of branded.
A small saved tray beats a chaotic one. If an effect doesn’t suit your lighting, your camera quality, or your niche, don’t keep it “just in case.”
Discovering Effects Organically in the Wild
Some of the best effects never get found through search. You find them because someone else already tested them in actual use.
That matters because an effect inside the gallery is still a promise. An effect on a live Story is proof. You can see how it behaves on skin, text, motion, shadows, and background clutter before you ever save it.
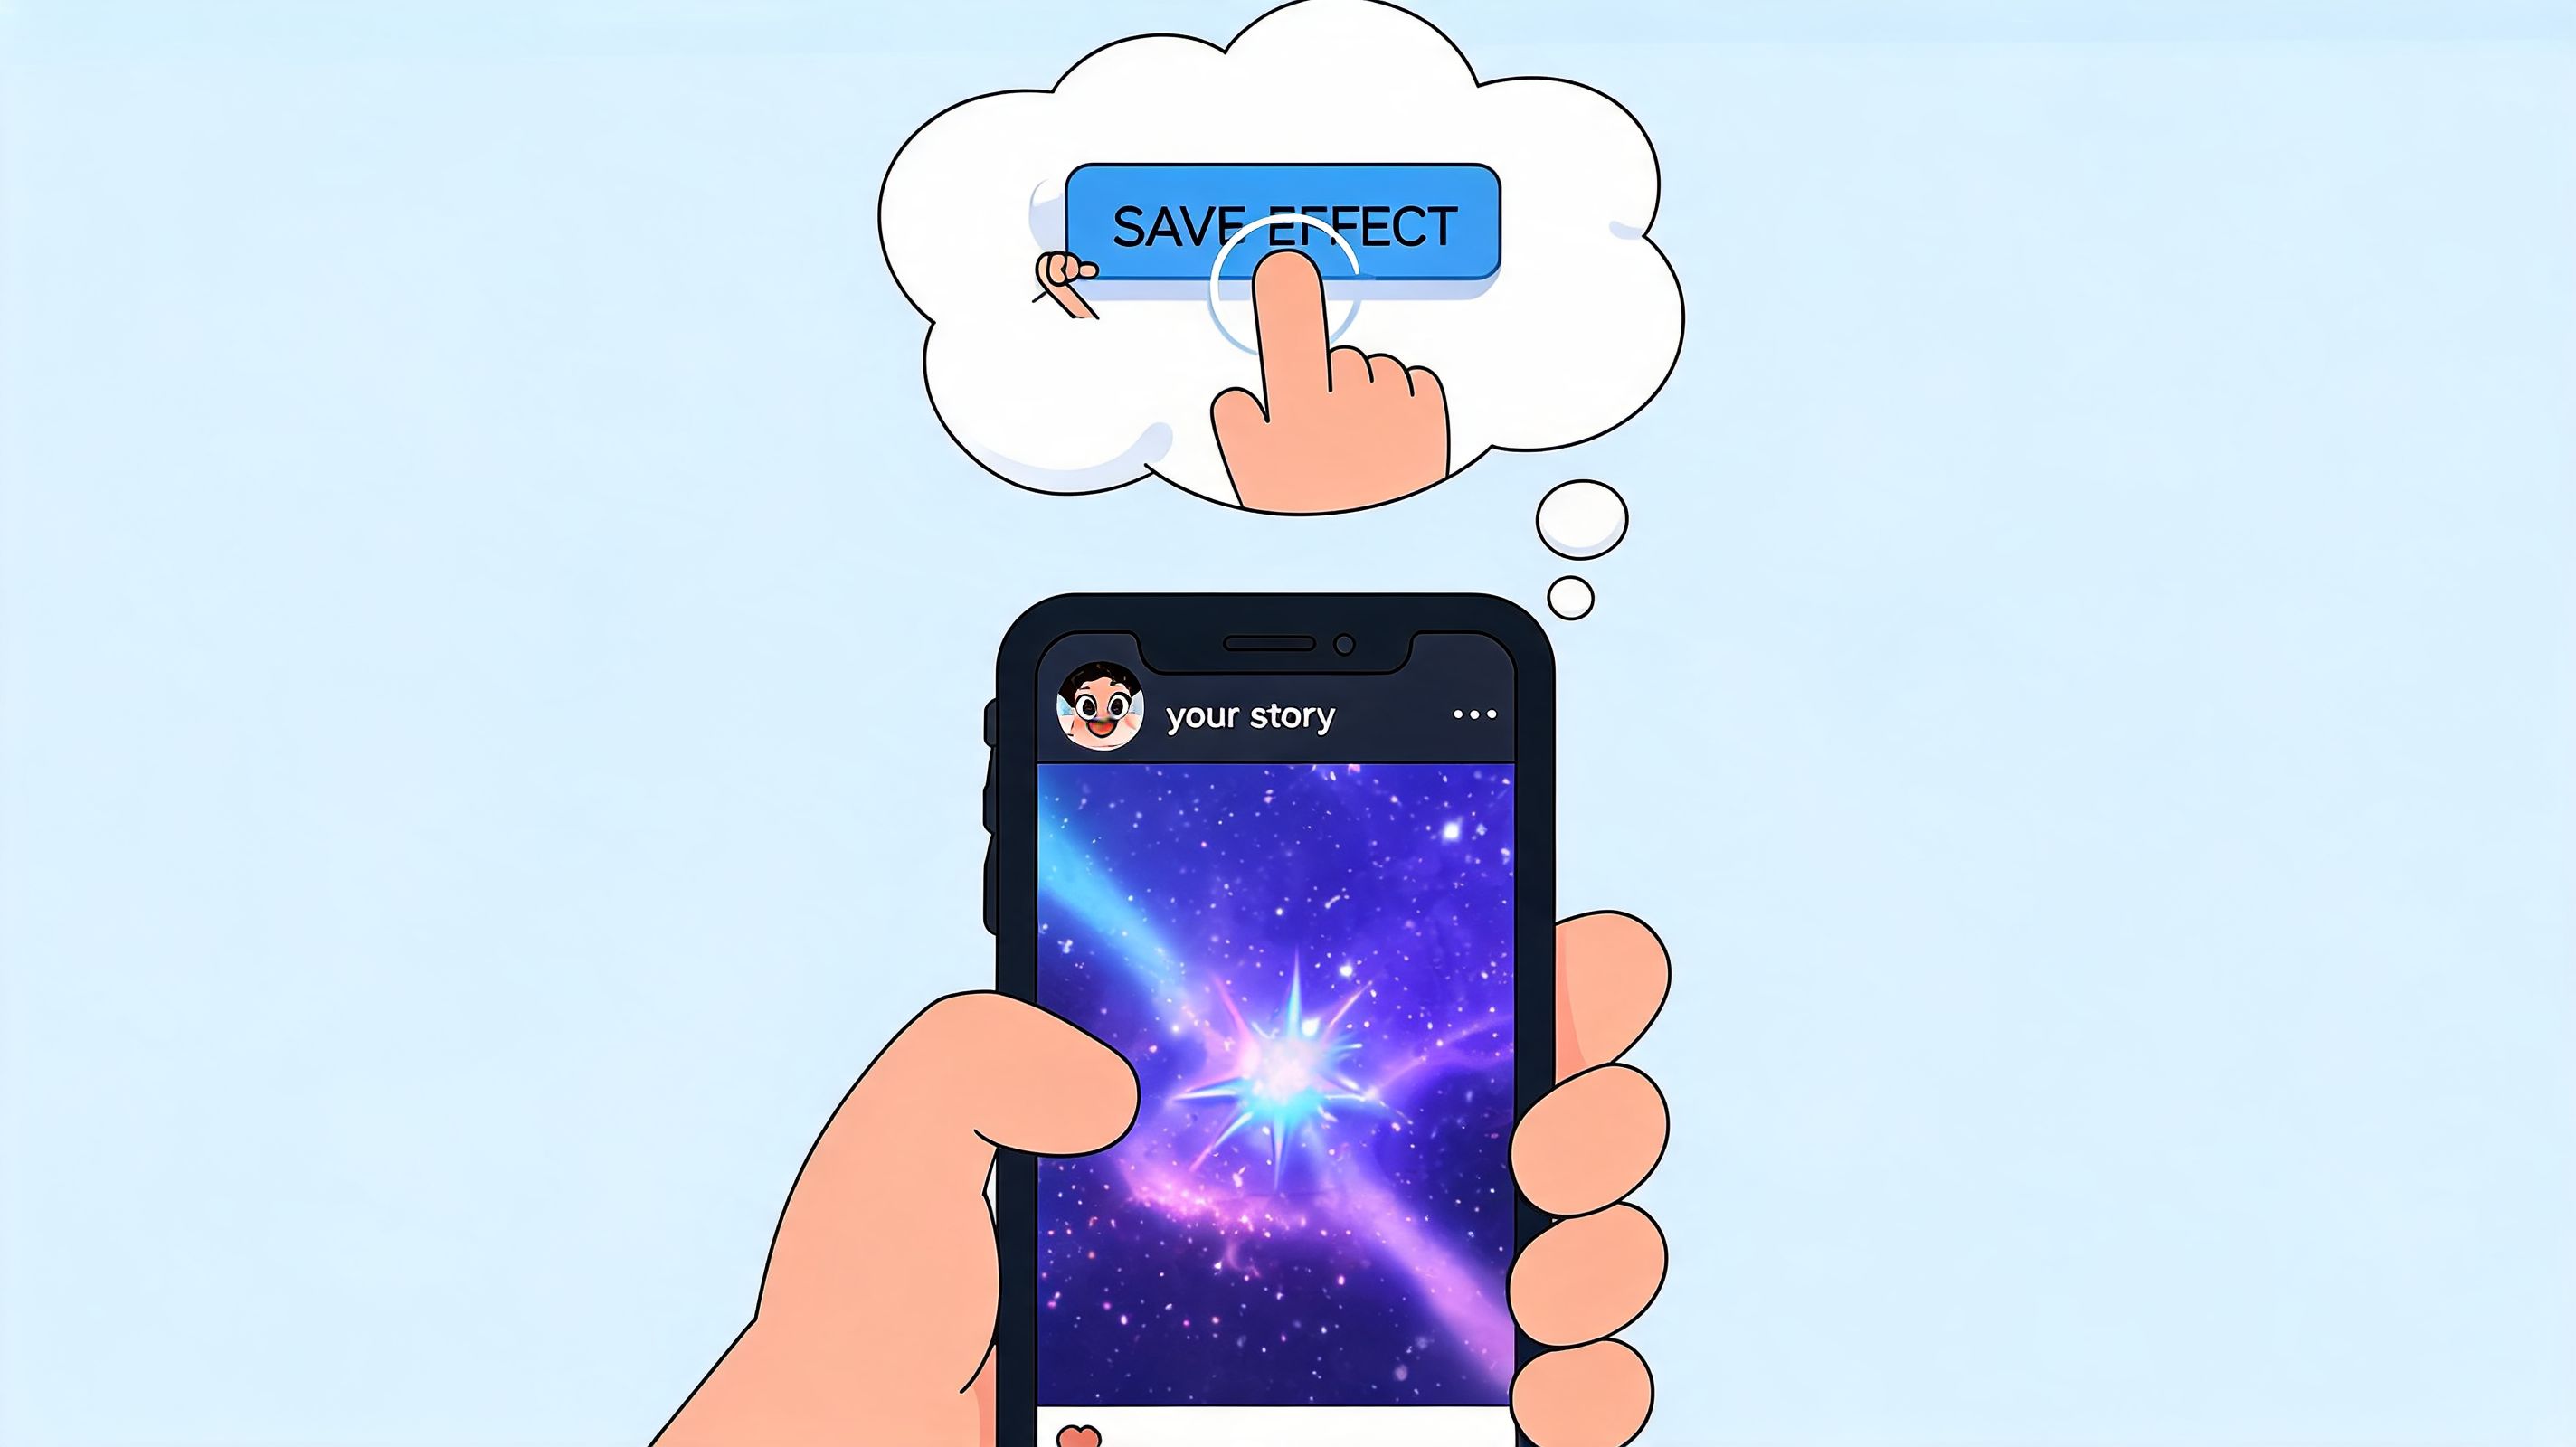
A practical way to find new filters is by watching other people’s Stories. When you tap the filter name, Instagram lets you preview it, Try it, or Save it. This method is used by 40% of creators and helps people discover beyond the main gallery, according to this source on Instagram Story filters.
How to grab an effect from someone else’s Story
When you see a filter you like:
- Open the Story or Reel.
- Look near the top area for the effect name.
- Tap the effect name.
- Choose the action that fits your next move.
The options matter:
- Try it if you want to test it immediately on your camera
- Save effect if you know you’ll use it later
- Send to if you want to share it with a teammate, client, or creator friend
If you create content in batches, save first. Don’t use it right away unless you’re already ready to record.
Why this method beats search for trends
Organic discovery is how you catch effects before they feel overused in your own feed. You’re seeing what’s already being used in context.
That makes this method strong for:
- Trend tracking: You notice the same look appearing across several accounts
- Niche matching: You can save effects that already perform well in your corner of Instagram
- Speed: One tap is faster than guessing keywords
There’s also a habit shift here. Scrolling doesn’t have to be passive. If you’re serious about content, your feed becomes research.
When you see a good effect, save it immediately. Most people assume they’ll remember it. They won’t.
A good routine for busy creators
Turn this into a lightweight workflow:
- During casual scrolling: Save anything that fits your brand
- Before content day: Open your saved effects tray and shortlist a few
- After posting: Keep notes on which looks felt natural on camera
If Instagram starts filling your feed with repetitive recommendations, clearing your own habits and using better discovery signals helps. This piece on Instagram Suggested for You is useful if your feed feels noisy and less relevant than it should.
Hunting for Effects Like a Pro Creator
If you stop at the gallery and whatever your friends use, your visual style will look familiar. Sometimes that’s fine. It’s not how creators build a distinct look.
The better move is to follow the people making the effects.
One of the strongest advanced tactics is creator tracking. Beyond native search, user Story feeds drive 35% of unique effect discoveries, and for low-visibility effects that algorithms miss, following AR creators such as @sparkar.creators or searching hashtags like #ARFilterName helps bypass search ambiguity, which causes 50% of synonym-based searches to fail, according to Metricool’s guide to Instagram filters.
Follow effect creators, not just influencers
Influencers use effects. AR creators make them.
That distinction matters. If you follow only influencers, you’ll keep seeing the same few popular looks recycled. If you follow effect creators, you get access to whole effect portfolios, including filters that never become mainstream but fit your brand far better.
Look for creators who specialize in a style:
- cinematic grain
- beauty cleanup
- weird face distortions
- gaming overlays
- nostalgic camera looks
When you find one strong filter, tap into the creator’s profile and browse the rest of their work.
Search like someone who knows the language
Weak searches fail because they’re too broad or too emotional. “Moody” could mean anything. Better searches describe the mechanics.
Use terms tied to what the effect does:
| If you want | Search terms worth trying |
|---|---|
| Texture | grain, dust, blur, sharpen |
| Lighting feel | glow, flash, shadow, soft light |
| Face effects | face warp, freckles, contour, skin blur |
| Era cues | camcorder, VHS, retro, disposable |
| Motion overlays | sparkle, particles, bokeh |
Hashtags can also help when standard search gets messy. If a filter name is hard to remember, searching an effect hashtag often surfaces related posts and creators faster than a vague word search.
Here’s a useful video if you want to see another walk-through in action.
Build an effect roster, not a random collection
A pro creator usually doesn’t keep a giant unsorted pile of filters. They keep a tight rotation.
A smart roster often includes:
- One safe everyday effect for talking Stories
- One signature look people start associating with your brand
- One trend-friendly option for Reels
- One wildcard for experiments
That mix gives you consistency without making every post look identical. If you’re also refining how your posts travel across formats, this guide on how to share stuff on Instagram helps make the most of the content once it’s styled well.
Troubleshooting Common Effect Search Issues
Sometimes the problem isn’t your search. It’s Instagram.
The most common failures are boring but fixable. A saved effect disappears. The search bar doesn’t show up. An effect opens for someone else but not for you. Most of the time, this comes down to app version, region, or a temporary app glitch.
According to the cited troubleshooting reference, regional geo-blocks limit 10 to 15% of effects in certain areas, and apps below v320 can see search functionality reduced by 30%. Keeping the app updated provides 100% uptime for the search feature in that guidance, as noted in this Business Insider reference on searching Instagram filters.
If search is missing or broken
Run this quick checklist:
- Update Instagram first: Old versions break effect search more often than people expect.
- Restart the app: Especially if tapping an effect does nothing.
- Check another account or device: That tells you whether the issue is local or account-specific.
- Try the gallery and Story discovery methods separately: If one path fails, the other may still work.
If an effect is unavailable
This usually means one of three things:
| Problem | What it usually means | Best response |
|---|---|---|
| Effect won’t load | Temporary app or cache issue | Restart app and retry |
| Effect vanished from saved tray | Creator removed it or Instagram changed availability | Revisit the creator profile if possible |
| “Not available in your region” | Regional restriction | Use a different effect and move on |
That last part is important. Don’t build your whole content plan around one effect that may not stay available in your market.
If a filter is hard to access, unstable, or inconsistent, it’s a weak foundation for a recurring content format.
If nothing seems to work
At that point, treat it as a broader app issue, not an effects issue. Things like cache problems, account bugs, and feature rollouts can break normal behavior. If Instagram is acting strange across other features too, this guide on why Instagram isn’t working is the right next check.
The practical takeaway is simple. Don’t spend half an hour forcing one effect to behave. Swap to your backup and keep publishing.
Showcase Your Signature Style with Taap.bio
Finding effects is only half the job. The other half is making your style visible anywhere people discover you.
A creator’s Instagram aesthetic often gets fragmented. A good Story disappears. A strong Reel gets buried. A new visitor clicks your bio link and sees none of the visual work you’ve put into your content. That’s a branding problem, not a creative one.

Why your off-Instagram presentation matters
When someone discovers you from a podcast, a collab, a newsletter, or a QR code, they often land on your link-in-bio page before they browse your feed in depth. If that page feels generic, your brand loses momentum.
A stronger setup lets visitors see your visual taste right away. That’s especially useful when your Instagram style is deliberate and repeatable.
What to show
A useful personal page should highlight the content that best reflects your look:
- Recent posts so visitors can see your current aesthetic
- Supporting links such as offers, videos, music, or booking pages
- Visual hierarchy so the page feels designed, not stacked
For creators who care about presentation, a custom layout matters more than a simple list of links. If you’re comparing formats, this guide to a custom landing page builder is a practical place to start.
Your effect choices become part of your brand only when people can recognize them across touchpoints.
That’s the ultimate goal here. Not collecting filters for the sake of it. Building a look people remember.
If you want a cleaner way to turn your Instagram style into a polished bio page, taap.bio makes that easy with a drag-and-drop layout and smart widgets that display your latest content in a more visual format than a plain link list.